TankBlanket: Winterisation that Works
The Motorhome & Caravan Tank Heater Pad
The TankBlanket Quick Start Guide aims to present a series of blogs that provide a clear and precise introduction to the installation and use of The TankBlanket System.
Links to more detailed information will be embedded in each Blog.
For simplicity and clarity, we will deal with one element of the system at a time, although, please contact us if you require further assistance or if you need information on a subject that has not been covered.
QSG1 – Installation of a single TankBlanket
Below we present four simple steps to install a single TankBlanket heater
pad. They are preparation, positioning, the electrical circuit and commissioning.
The salient points are presented in bullet form; for detailed installation
guidelines please visit:
The installation guidelinesand the electrical circuit
are available to download from:
TankBlanket the motorhome or caravan fresh and waste water tank heater pad:
 |
| Applied to the BOTTOM of the tank with a side overlap |
 |
| Applied to the BOTTOM of the tank - flexible TankBlanket |
- Can be fitted to any poly-plastic fresh or waste water tank.
- Must not be fitted to any form of metal or conductive surface.
- Must be fitted to a surface that has been cleaned using an alcohol based cleaning agent.
- Must be fitted when the ambient temperature is greater than 10 °C.
- Must be fitted to the bottom of the tank.
- Must be fitted directly to the tank and not across any metal holding straps.
- Must be completely attached to the surface of the tank.
- Is flexible and can be wrapped up the side of the tank, although the majority of the heater pad must remain on the base of the tank.
- Can be fitted onto a ribbed or grooved tank. Carefully apply the heater pad to the contour of the tank making sure the entire pads surface is in contact with the tank.
For detailed installation guidelines please visit:
 |
| Peel & Stick - simple |
2.0 Positioning
For best results the TankBlanket heater pad must be positioned:
 |
| Applied to the BOTTOM of the Tank |
- On the bottom of the tank.
- As close to the outlet drain as possible.
- Below the internal water pump.
- Under any tank holding/retaining straps, NOT across the top of them.
- So the lump, that is, the thermostat is not covered by the tank holding straps.
Tip1: Place a rubber strip between the heater pad and tank metal retaining straps. It prevents the pad possibly being rubbed/ cut by the metal holding strap.
Tip2:If an internal pump is fitted in the tank, then from our experience with cold chamber testing, it is better to position the feed pipe so it enters through the sidewall rather than the top of the tank. This prevents an ice 'slug' forming where the pump feed pipe enters the water in the tank. With the feed pipe entering the side wall of the tank a ice 'slug' is prevented from forming due to being under the 'waterline'. Refer to our Dealer/Converter leaflet from: http://www.tankblanket.co.uk/downloads/
For detailed installation guidelines please visit:
3.0 Electrical Circuit
The TankBlanket heater pad must be:
- Powered by a 12 Vdc supply from the Leisure battery.
- Protected by a 15 amp fuse.
- Protected by a 10A rated LED Switch.
- Powered through a single stand alone circuit.
For detailed installation guidelines please visit:
For the electrical circuit diagram please visit:
 |
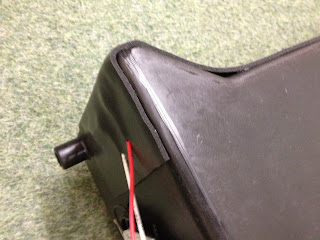
| TankBlanket fitted ! |
4.0 Commissioning
To commission the TankBlanket heater pad:
-
Turn the switch on. The LED light will light up showing there is power.
- If the ambient temperature is above 7°C place a freezer block over the pad thermostat, that is, the raised lump. This will fool the thermostat.
- The centre of the tank heater pad should feel warm. Your TankBlanket is installed correctly.
The detailed guidelines on installation along with electrical circuits
are available to download from:
TankBlanket is The Tank Heater for Winterisation that Works!
Have you found this blog informative, interesting?
If so please leave a comment. Thanks in advance.
Do you have any ideas or suggestions?
If so, please visit our website and leave feedback on our ‘Ideas’ tag,
located on the left hand side of our home page.
To find out more about The TankBlanket System please visit:


No comments:
Post a Comment